All about Pruning of Bonsai

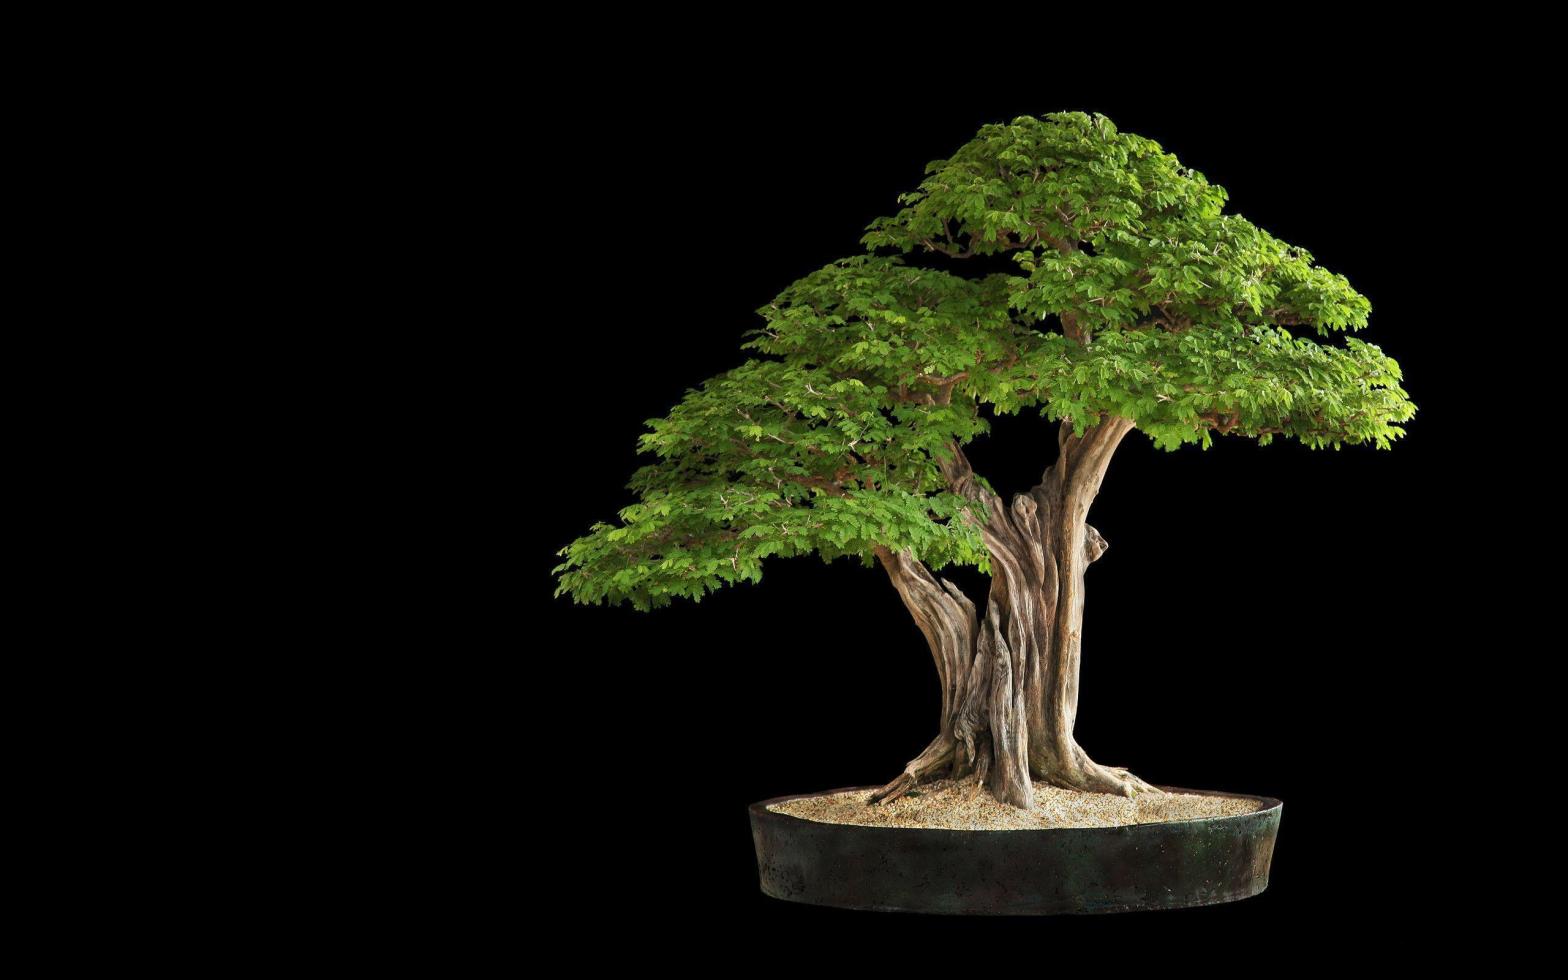
Bonsai trees are known for their beautiful, miniature appearance, which is achieved through careful pruning and shaping. Pruning is the process of selectively removing branches to control the shape and size of the tree. However, pruning is not just about cutting off branches; it requires careful planning and attention to ensure that the tree remains healthy and attractive. In this article, we will discuss how to prune bonsai and the care that should be taken before and after pruning.

Why Prune Bonsai Trees?

There are several reasons why bonsai trees need to be pruned. The primary reasons are:

  1. To shape the tree: Pruning is used to shape the tree and create the desired form. By removing branches strategically, you can create the illusion of a mature, full-sized tree in miniature form.
  2. To control the tree’s size: Bonsai trees are small by nature, but they can still grow quite large if left unchecked. Pruning is used to keep the tree small and in proportion with the pot it’s planted in.
  3. To promote new growth: By removing old or damaged branches, you can stimulate new growth in the tree. This can help to improve the overall health and vitality of the tree.

When to Prune Bonsai Trees?

The timing of pruning depends on the species of bonsai tree and the desired outcome. In general, pruning should be done during the tree’s dormant period, which is typically in the late fall or early winter. This is when the tree is least likely to experience stress from pruning. However, some species of bonsai trees, such as azaleas, should be pruned immediately after they finish blooming in the spring.

Before Pruning: Preparation

Before pruning, there are several steps you should take to prepare the tree and ensure that it is healthy and strong enough to handle the stress of pruning.

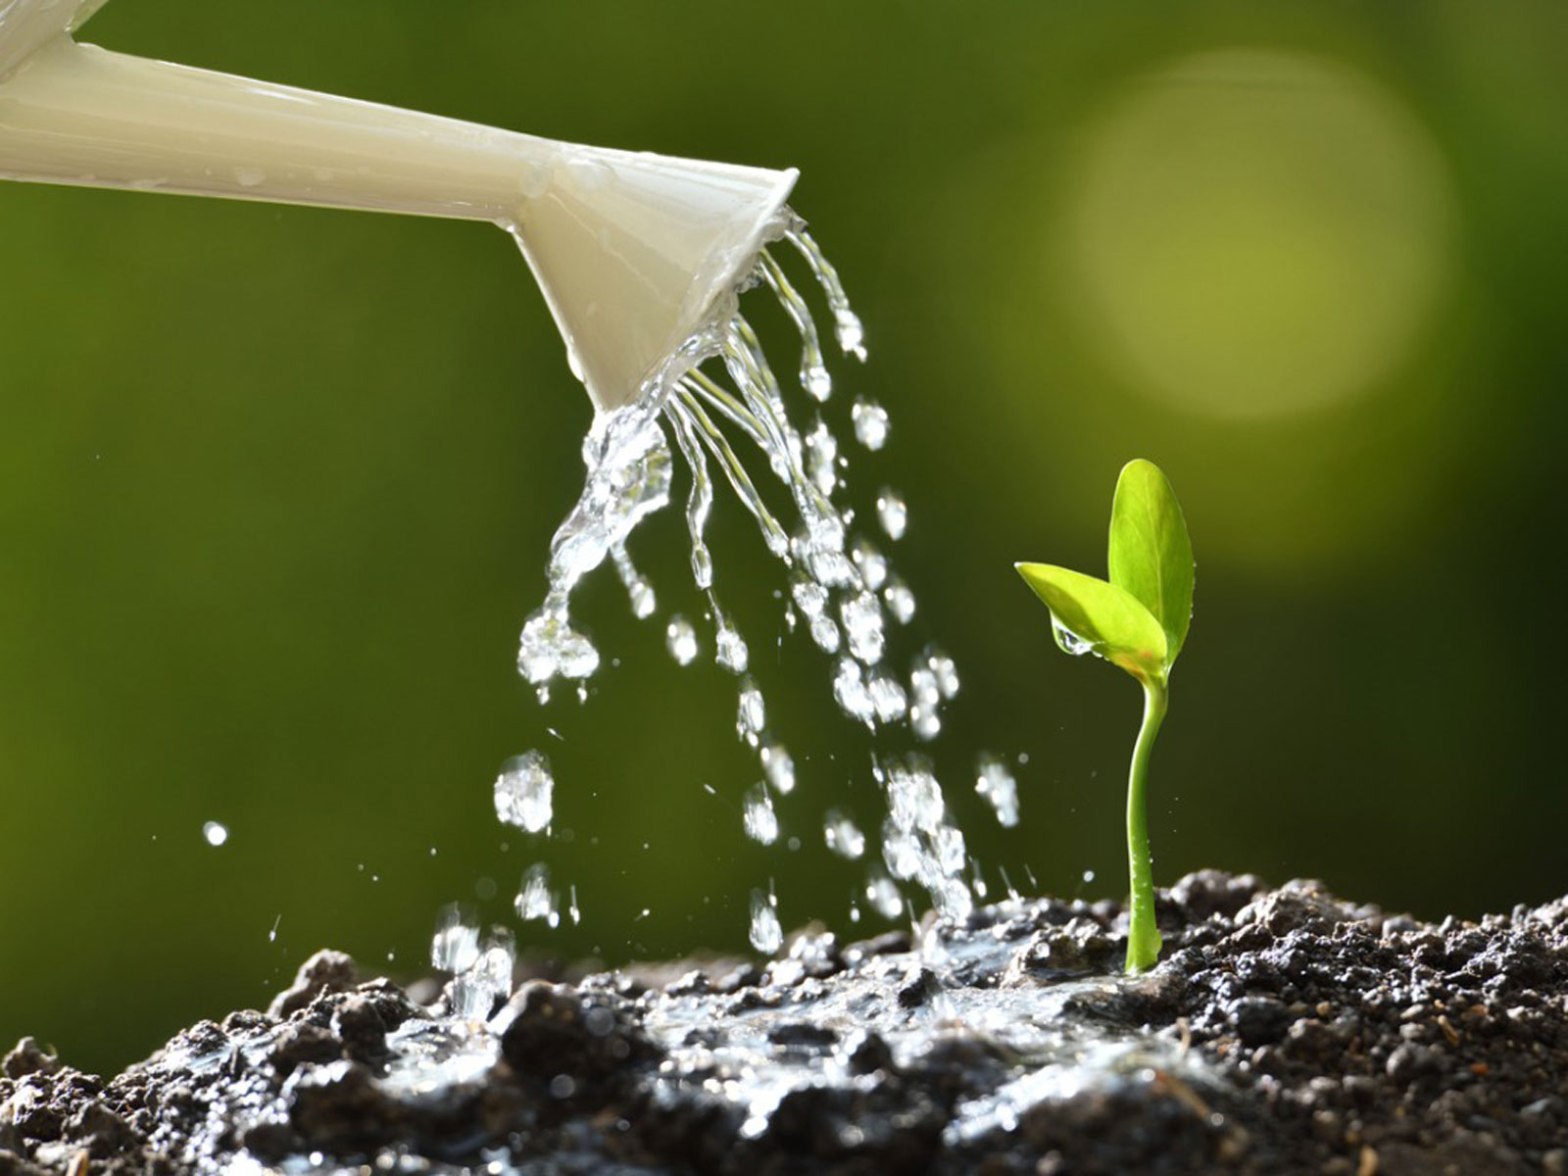
  1. Water the tree: Water the tree thoroughly a day or two before pruning. This will help to ensure that the tree is well-hydrated and less likely to experience stress during pruning.
  2. Inspect the tree: Take a close look at the tree and identify any dead, diseased, or damaged branches that need to be removed.
  3. Gather the necessary tools: You will need a pair of pruning shears or scissors, a concave cutter, and wire cutters. Make sure that your tools are sharp and clean before you begin.
  4. Prepare the soil: Remove any weeds or debris from the soil, and make sure that the soil is moist and well-draining.

The Pruning Process

Once you have prepared the tree, it is time to begin pruning. The following steps will guide you through the process:

  1. Choose the branches to be removed: Identify the branches that need to be removed based on your desired outcome. Dead, diseased, or damaged branches should be removed first. Then, you can remove branches that are interfering with the tree’s overall shape.
  2. Cut the branch: Use the pruning shears or scissors to make a clean cut just above the branch collar. The branch collar is the raised area where the branch meets the trunk. Cutting too close to the trunk can cause damage, while cutting too far away can leave a stub that will take longer to heal.
  3. Shape the tree: After removing unwanted branches, you can shape the tree by pruning the remaining branches. Use the concave cutter to remove larger branches, making a clean, concave cut to promote healing. Use the pruning shears or scissors to trim smaller branches and leaves.
  4. Wire the branches: After pruning, you may need to wire some of the branches to help shape the tree. Use wire cutters to cut the wire to the appropriate length and wrap it around the branch, being careful not to

Some additional important tips and information on pruning bonsai:

  1. Pruning Techniques: There are several pruning techniques used in bonsai, including pinching, pruning back to buds, and directional pruning. Pinching involves removing the tips of new growth with your fingers or bonsai scissors, which can help to create denser foliage. Pruning back to buds involves cutting a branch back to a bud, which will encourage new growth in that direction. Directional pruning is used to direct the growth of a branch by cutting it back to a side branch that is growing in the desired direction.
  2. Maintenance Pruning: Regular maintenance pruning is necessary to keep bonsai trees healthy and looking their best. This involves removing any new growth that is unwanted, such as shoots that are growing too long or in the wrong direction. Maintenance pruning should be done throughout the growing season, but be sure to avoid pruning too much at once, as this can stress the tree.
  3. Wiring: Wiring is used to shape the branches of a bonsai tree by gently bending them into the desired position. The wire should be wrapped around the branch in a spiral pattern, starting at the base and working towards the tip. However, be careful not to wire the branches too tightly, as this can damage the bark.
  4. Aftercare: After pruning, it is important to take care of the tree to ensure that it heals properly. Keep the tree out of direct sunlight and wind for a few days, and avoid watering it for at least a day after pruning. You can also apply a wound sealing paste to any large cuts to help prevent infection.
  5. Pruning for Different Tree Species: Different bonsai tree species have different growth patterns and pruning needs. For example, conifers should be pruned in the spring or early summer, while deciduous trees can be pruned in the winter. Research the specific needs of your tree species before pruning to ensure that you are doing it correctly.

In conclusion, pruning is an essential part of maintaining a healthy and beautiful bonsai tree. With proper preparation and technique, you can shape your tree and promote new growth while avoiding damage and stress to the tree. Regular maintenance pruning and care will ensure that your bonsai continues to thrive for years to come.

Did You Know Your Plants Dying Because Of Water.

Watering the plants are the most important that we have to do during taking care of a plant. But many of us who are beginners here don’t know that they have to water the plants( not joking some peoples have asked me does they really have to water their plants). But apart from that many who are regular gardeners also sometime misconcept about watering. They overwater or underwater which results in plants death. So for those of you I have decided to write this, and give you some knowledge about how to water your plants properly.

Myths in Watering:

  • Water your plants everyday.
  • Water your plants until it oozes out.
  • Water in day, not at night.
  • Don’t water in summer afternoon.
  • Don’t water over the plants.
  • Water less in winter.
  • Use fresh water for the plants.

How to Water My Plant?

In case of watering everyone should be flexible that is you must have to look upon your plants and understand them and water them only when they are required to, not more not less. There are some plants those require a lot of water whereas some could not tolerate a very less water. So it is also necessary to know about the water requirements of the plants. Again according to the situation watering should be changed in hot summers we need to water regularly than in rains or during transplantation there should a sufficient amount of water such that it does not wilt.

Are the Myths Correct?

Some are correct, but all are not. Listening to anyone else without doing a homework about the matter is foolish. I would suggest to know your plant and about your plant and you will be self sufficient about what to do and when.

How to check that a plant need water?

It is really hard for many of us to know whether a plant needs water or not, for this a simple trick is finger dip method. In this method you can dip your finger into the soil up to half a inch and see whether it is wet inside or not then you can easily avoid overwatering or underwatering. This will help you to grow a very good experience about the matter.

How to know you have Overwatered or Underwatered your plants?

Both overwatering or underwatering for a long period is deadly for the plant. So the first thing to do is to regularly check the soil. A wet soil is dark in colour and it must be loose and clayey. But on the other hand dry soil will be of lighter shade and hard. On the plant you could also see the effect, in overwatering the plant will be rotting specially the leaves and lower part of the shoot. Whereas in case of underwatering plants will firstly wilt, then the leaves will be yellow and shed the leaves and the shoots will be dried out towards the tip(away from the base). A fact is that in case of overwatering it affects the bottom part of the shoot (radical) whereas the underwatering affects tips of stems.

What are the remedial measures of Over or Underwatering?

For overwatering, first stop watering and keep your plant in place with plenty of sunlight. And if rot has started apply fungicides on and around the rot.

In case of underwatering give it a sufficient amount of water and place it in a moist and cool area away from sunlight for some days.

Mineral Elements Required in Plant Nutrition

Macronutrients:

Nitrogen (N):

Used in larger quantities than any other mineral nutrient. Most frequently deficient for normal growth of non-legumes

Forms taken up by plants: NO3 NH4+

Function in plants:

  • It is part of the amino acids which make up proteins
  • It is part of the chlorophyll molecule

Deficiency symptoms:

  • Plants become stunted and/or become yellow on the older leaves
  • N is mobile in the plant so new leaves may remain green
  • Excess N may delay maturity
  • Cause excess growth and little fruiting on melons and tomatoes. Excessive succulence may make a plant more susceptible to disease or insect attack.

Phosphorus (P):

Forms taken up by plants: H2PO4– primary orthophosphate, H2PO4 secondary orthophosphate

Function in plants:

  •  a part of the protein molecule   
  •  Necessary for transfer of energy during metabolic processes (ATP)    
  • Hastens maturity, promotes good root development, improves growth and cold tolerance, and improves seedling vigour, important in seed and fruit formation.

Deficiency symptoms:

  • Dark green colour
  • Purple cast in corn, lower leaves first because p is mobile.
  • Delay in maturity
  • Failure of seed to form

Potassium (K):

It is used in larger amounts than any other element except N. May have “luxury consumption” plants take up more than is needed. K is not a part of any structural component of the plant. Located in the cell sap as an inorganic salt.

Forms taken up by plants: K+

Function in plants:

  • It is a catalyst in many reactions; carbohydrate, starch and N metabolism
  • Activation of enzymes involved in photosynthesis, and protein and carbohydrate metabolism
  • Adjustment of stomatal movement and water relations
  • Helps disease resistance
  • Increases quality of fruits and vegetables
  • Tips and margins of leaves turn brown. K is mobile so this occurs first on lower leaves.

Deficiency symptoms:

  • Weakening of straw in grain crops (lodging)
  • K is important in preventing non-protein N from accumulating in plants. When this occurs in forages it may be injurious to animals

Micronutrients:

Calcium (Ca):

Forms taken up by plants: Ca++

Function in plants:

  • Calcium gives strength to cell walls
  • Needed for peg development in peanuts
  • Plant root and tip elongation

Deficiency symptoms:

  • Ca is immobile so new growth is affected
  • Failure of terminal buds to develop
  • Symptoms are not usually seen under field conditions because other problems caused by acidity of soil will generally become limiting factors before Ca. That is, liming prevents Ca deficiency from occurring.
  • Blossom end rot of tomatoes is an exception to this generalization

Magnesium (Mg):

Forms taken up by plants: Mg++

Function in plants:

  • A part of the chlorophyll molecule, essential in photosynthesis
  • Related to phosphorus metabolism
  • Large quantities found in seed

Deficiency symptoms:

  • Mg is mobile so symptoms occur first in old leaves.
  • Interveinal chlorosis. A whitish or yellowish striping effect on grasses.
  • Tobacco – referred to as sand drowning.

Sulphur(S):

Forms taken up by plants: sulphate some SO4-2 (Sulphur dioxide through leaves).

Function in plants:

  • A constituent of 3 of the 21 amino acids which form protein cystine, cysteine, and methionine
  • Present in the organic compounds that give the characteristic odours of onion, garlic, and mustard.

Deficiency symptoms:

  • Uniformly chlorate plants which are stunted and spindly. Similar to N deficiency symptoms. It is less mobile than N so deficiency may be more apparent on younger leaves.

Manganese (Mn):

Forms taken up by plants: Mn++, Mn+++

Function in plants:

  • Can be absorbed through the leaves. Required in small quantities – large amounts are toxic (acid soils)
  • Activation of enzyme systems
  • Chlorophyll synthesis

Deficiency symptoms:

  • Mn is immobile – The upper leaves develop yellow streaks.

Iron (Fe):

Forms taken up by plants: Fe++ (ferrous form) Fe+++ (ferric form), Can be taken up by the leaves

Function in plants:

  • A catalyst in the production of chlorophyll
  • Enzyme systems
  • Occur on high ph soils or certain plants
  • Centipede, azaleas.

Deficiency symptoms:

  •  Immobile so deficiency symptoms occur on young leaves. Interveinal chlorosis. Leaves may turn completely white

Copper (Cu):

Forms taken up by plants: Cu+2 can be absorbed through leaves. Very toxic if too much applied.

Function in plants:

  • Copper is a catalyst in chlorophyll formation

Deficiency symptoms:

  • Immobile so upper leaves affected
  • Corn youngest leaves are yellow and stunted
  • Vegetables – plants wilt and develop a bluish green cast.

Zinc (Zn):

Forms taken up by plants: Zn+++ can be taken up through leaves. Toxic except in small   quantities

Function in plants:

  • Activator of enzyme systems
  • Deficiency symptoms:
  • Occurs on younger leaves (immobile)
  • Interveinal chlorosis followed by reduction in rate of shoot growth and shortening of internodes (rosetting)

Boron (B):

Forms taken up by plants: H3BO3 can be taken up through leaves

Function in plants:

  • Can be very toxic if applied to some crops at rates not harmful to others. Deficiency occurs frequently on alfalfa.
  • Germination of pollen grains and growth of pollen tubes

Deficiency symptoms:

Immobile upper leaves affected. Growth of terminal bud stops

Molybdenum (Mo):

Forms taken up by plants: Mo required in smallest amounts of any mineral nutrient. Excess may be toxic to grazing animals. Moo4

Function in plants:

  • It is needed for conversion of NO3- to NH4+ in the plant
  • Required by rhizobia for N fixation in the nodules of legumes

Deficiency symptoms:

  • Interveinal chlorosis
  • With legumes it appears as N deficiency (that’s what it is

Chloride (Cl):

Forms taken up by plants: Cl-

Function in plants:

  • Photosynthetic reactions
  • Reduced root growth in nutrient cultures.

Deficiency symptoms:

  • Excessive quantities has a detrimental effect on quality of potatoes and tobacco storage quality of potatoes reduced. Smoking quality of tobacco lowered.

Silicon:

Needed in small quantities by rhizobia for fixation of N in association with legumes. 8 oz/acre on clover gave response essential in formation of vitamin B-12.

Shown to be essential for a green algae

Not shown to be essential for higher plants but growth increases were shown with asparagus, rice, lettuce, barley, corn.

Functions: may be essential for carbohydrate metabolism in some plants. May substitute for potassium

Increased growth of rice in nutrient cultures. Function unknown.

In short we see:

N – Synthesis of proteins and part of chlorophyll molecule

P – Energy transfer

K – Carbohydrate metabolism, water relations

Mg – Chlorophyll molecule

S – Proteins

Ca – Strength of cell wall

Micronutrients – Enzyme activation

Hope you will benefit from this for any query comment here. And Follow to stay updated about new tips for your garden.

The Best Fertilizer For Your Plants

What your plant eats is mainly dependent on what is the current requirements of your plant. So before providing any fertilizer you must have a clear knowledge about what your plant needs.

What does your plant needs?

The fertilizers you provide is not used by the plant in the similar forms you give. They are stored and used up in the process of photosynthesis. Now the mineral requirements of a plant could be divided into two categories that are those Macronutrients and Micronutrients.

Macronutrients:

Nitrogen, Phosphorus, Potassium. These are the elements which are used up by the plants in higher amounts. These components mainly helps in growth, flowering and fruiting of a plant. Though the requirements of these elements are different for different plants, but the deficiency may lead to rickets as well as death of your plants.

Micronutrients:

These are the elements which are used up by the plants in lesser amounts. Such as Calcium, Magnesium, Sulphur, Manganese, Iron, Copper, Zinc, Boron, Molybdenum, Chloride. The main job of these nutrients is enzyme activation. To some special plants it gives rigidity to cell wall, supply proteins and chlorophylls. For some plants Calcium, Magnesium, Sulphur also acts as macronutrients.

Other elements:

Cobalt, Vanadium, Sodium, Silicon. These are some of the other elements required for some particular species of plants.

To know more about the mineral elements follow/ subscribe this site and stay tuned click here.

Where to get this minerals for your plants?

Now the question is what should you give to plants such that they will get the most of these required nutrients. So you may give inorganic fertilizers which are element specific as well as combined ones. These are easy to use and have a quick effects on plants. But you should remember that these inorganic fertilizers most deadly to your plant in the long term. This reduces the soil capacity to hold nutrients and clearly have an effect on your plant, these have many side effects to your garden and over dosage may be deadly. Again for some urgent need it’s not bad to use these inorganics in your garden especially for the seasonal flowers. But overall I would recommend you not to use the inorganics but to stick to the organic alternatives.  

Organic fertilizers:

A large number of organic fertilizers are available in the market for your plants, most common are compost, vermicompost, mustard cake, etc. these all performs very well for every plants. Though these are some slow but it hardly have any side effect or have any problems on over dosages.    

If you have a little space and some time you can get a continuous supply of organic fertilizer at home completely free. Now I will explain how I made fertilizer at home.

Equipment: The only thing you require are two buckets one is slightly smaller than the other such that one fits at the top of the other keeping some hollow space down. Just as explained in diagram. Now make some small holes at the base of the bucket which is bigger i.e. which will be kept above. And your equipment is ready. Now arrange as shown in the diagram.

Procedure: Then put a little bit of mud inside the bucket you made holes. Now it’s obvious that you every day have some kitchen wastes, garden wastes, like leaves and other rotten things from your garden which you have to put it in that bucket. Don’t use cooked foods or non-veg items in it. Fill it when you see that the volume of these waste have lowered after decomposing for some days. For quick decomposition apply 1 spoon of curd or yogurt in it. After 2 to 3 days you will see that your fertilizer is available in the lower bucket.

Dosage: You have to dilute it 100ml approx. for 1 liter water and apply to plants once in 15 days.

Benefit: This liquid is mainly rich in N-P-K and will be acting as macronutrients.

N – Synthesis of proteins and part of chlorophyll molecule.

P – Energy transfer.

K – Carbohydrate metabolism, water relations.

Now I had mentioned plants need some micronutrients for which the most recommendable is the seaweed extracts, which is a fully organic source of micronutrients. It is mainly formed from the seaweeds and corals, by making paste or liquids. You must use this but use in less amount mentioned by the brand on the pack.

But as mentioned you firstly required to have a complete knowledge what you unique plant is currently asking for. Hope you will benefit from this for any query comment here. Similar important tips are going to be published on pesticides, so Follow to stay updated about new tips for your garden.

Tips To Grow Roses Easily

From western culture it has been believed that Roses were created by the goddesses of love Aphrodite. According to the legends, her tears and her lover, Adonis’, blood watered the ground from where roses grew.

Apart from the legend now we have started growing roses for the beauty of our heart in the garden. It needs more care and softness than its petals are.

There are more than 150 varieties of rose across the globe. Though this plant thrives best in temperate climate conditions but in torrid temperatures also it blooms in winter.

Ideas:

Roses not only represents romanticism but it also shows the true form of art. Some ideas to grow roses are:

  • Gate: Most people like to form gates with rose plants, and it looks gorgeous when it blooms.
  • Container: Now it has been an overcoming trend for all gardeners to have roses in pots.
  • Indoor: Some peoples are even growing roses in their homes, with a plentiful of sunlight. This gives a delightful fragrance which will make a relaxing feel.
  • Bushes: Rose bushes are very common if it been cultivated in a large scale. But many grow it in their gardens too.

How to take care of your rose plants?

  • Choosing a plant: Choosing a plant is the most important step to grow any plant. Roses could be broadly categorized into two types Indian Variety and English Variety. Indian variety are small in size but it grows throughout the year even in equatorial regions and has it’s max bloom during winter. Whereas English Variety are larger but only grow in winter in equatorial regions. And both of them blooms well throughout the year in cold climate regions.
  • Collection of a plant: Roses are mainly propagated through cutting and grafting. Grafted ones are easier to grow.
  • Soil: Though Roses are hungry plants, during the plantation its no need to provide a high quantity of fertilizer. It could be grown best in laterite or alluvial soil. But it could also be grown in mixture of compost 40%, sand 20%, garden soil 20%, bone meal 5% and horn meal 5%.
  • Sunlight: It requires at least 6 hours of daily sunlight. But in high temperature regions it should be only provided in winters, during summer it should be kept in shades. Better to keep it under green nets.
  • Watering: Soil should be well drained, and deep watering should be done as roses are water loving. As it loves moisture, water spray is also necessary. But all types of watering should be done in the earliest morning or the plant may get shock.

Advanced care: 

Fertilizer:

To fertilize your plants you need an expert knowledge of what each component, you are using, have its effect on the plant. And obviously the amount to be used. Roses mainly requires NPK, Magnesium, Sulphur, Calcium and copper, zinc, iron, manganese, boron are also required in very small quantities.

  • Organic: It’s better to use organic fertilizer to each and every plant. It will not give an instant effect but is a good choice for long run. Organic fertilizer could be used once a month. And surely to be given just before winter. Now there are two recipes 
    1. Solid: vermicompost 40%, used tea/coffee leaf 20%, neem cake 20%, bone meal10%, fish meal 5%, egg shell5%. Precaution: This is not to be provided for newly planted plants. This is to be given in adequate amount. 50gms for small plants 100gms for large plants and 500gms for large plants (only in soil). No undecomposed fertilizer to be added as there will be a chance of fungus. 
    2. Liquid: In 5 litres of water mustard cake 100gm, neem cake 200gm, banana peel 200gm, orange peel 200gm to be decomposed for 10 days and then the water could be provided to the plant after dilution.  
  • Inorganic: If you are not satisfied with the organic fertilizer and want to have a quick effect on plants then you may use PGP (Plant Growth Proteins), Seaweed Fertilizer, Micronutrients, Vitamins etc. But remember in case of inorganics a plant uses only a little amount and the rest are stored in soil which makes the fertilizers unusable for future and that’s acidify the soil. So if you use inorganic fertilizers then apply less than the amount mentioned to apply on the soil.

Pruning:

Roses are most prone to bacteria and fungi. And rotten flowers, half yellow or brown leaves will boost up the fungi attacks. For this it need to be pruned (2-3 inches) whenever you see an old flower or yellow leaves before it starts to rot. This will also increase flowering rate by raising branches. This is known as soft pruning.

Removing Suckers:

In cases of grafted rose plants suckers grow from the stock i.e. the mother plant. These suckers take up much nutrients and let the plant to reduce its growth and flowering. So how can it be identified? Simple, you will see that Suckers are the stems that will grow from below the place of grafting, near the ground. And normally roses have 5 leaved compound leaves but suckers have 7 leaved compound leaves. So you just need to cut it off.

Diseases and Cure

Here I have already mentioned many times that rose plants needs special care and are very prone to diseases like bacterial and fungal attack. And many insects attack roses. 

Here also you can use organic medicines. To make it use baking soda 10ml, neem oil 10ml and a small amount of mild soap in 1 litre water. This should be sprayed at the earliest morning or before the sunrise and not only the upper portion of leaves to be sprayed but the underneath too. And as an inorganic medicine there are different types of fungicides available in the market. Use it but in less amount.

So get a Rose plant and have a plentifully of roses this winter. As it is now easier for you to grow plenty of gorgeous roses. For the beginners I will suggest that have a regular look over those plants.

To know more about your rose plants comment here and follow the site.

Top 38 Indoor Plants could be grown easily

In the world of growing technological developments many of us are aware of ever increasing pollution. And some of them have involved them in various works to reduce outdoor pollution. But we should now look up at the indoors too. There are various pollutants that are being formed at houses. In that case indoor plants are most effective. 

Most of us thinks that indoor plants are too difficult to grow and a lot of care is to be provided to them. But you will be surprised that these are too easy to grow and could be grown by those also who get a very less time to care about the plants. The only thing you need to do is to choose the correct plant. Plants those are under mentioned can be grown easily. For knowing how to grow these plants easily, see my another article Grow Indoor Plants Easily.

  • Peace Lily
  • Snake Plant (Mother in Law’s Tongue)
  • Lucky Bamboo
  • Bamboo palm
  • Chinese Evergreen 
  • Jade Plant
  • English Ivy
  • Dragon Tree
  • Rubber Plant
  • Aloe Vera
  • Philodendron 
  • Philodendron Birkin
  • Geranium
  • Money Plant
  • African Violet
  • Begonia
  • ZZ Plant 
  • Crown of Thorns
  • Bromeliad
  • Kalanchoe
  • Air Plant
  • Spider Plant 
  • Table Palm
  • Christmas Caclus
  • Ponytail Palm
  • Dieffenbachia 
  • Cast Iron Plant
  • Asparagus Fern
  • Fiddle Leaf Fig
  • Schefflera
  • Pleomate
  • Calathea
  • Guiana Chestnut
  • Yucca
  • Peperomia
  • Phalaenopsis Orchid
  • Anthurium
  • Aralia

For more information about the plants comment here.

7 Important Tips To Grow Indoor Plants Easily

In today’s world we are running with an ultra-high speed of technological development. And some where we are forgetting about the nature. So it’s high time now that we think about it and start planting trees. But most of us have a very restricted place to do so. For them indoor plants will be an ideal one.

Benefits

Now a days planting small plants indoor have become a trend. This not only give you a feeling of in-between the nature but also keep the indoors fresh and full of oxygen. For those who lives in regions with high pollution level, must have plants indoor.

What types of plants do you choose?

In case of choosing plants for indoors, you must have some criteria.

  • Shade Lovers: Collect plants that could be grown under shades easily. But for almost every indoor plants you need to provide them partial sunlight once a week. 
  • Oxygen level: Some plants like Aloe Vera or types of snake plants provide a little amount of oxygen even during night time. So choosing that type of plants are good choices.
  • Toxicity: If you have pets or have your children at home then you must have special care as some plants maybe toxic if swollen or eaten. Like money plant or spider plant or some types of succulents.

Best Indoor Plants to grow

According to NASA Report this plants ranks best as indoor plants;

  • Bamboo palm
  • Chinese evergreen
  • English ivy
  • Ficus
  • Gerbera daisy
  • Janet Craig
  • Marginata
  • Mass cane/Corn cane
  • Mother-in-law’s tongue
  • Peace lily
  • Pot mum
  • Warneckei

For more indoor plants to know about see my other article 38 Indoor Plants To Grow.

How to grow them easily.

1. Soil: For indoor plants it is been referred to use mixture of coco peat and compost.

2. Watering: Watering plants doesn’t only mean to pour water in the soil. For indoors watering is proposed to be done by spray.

3. Sunlight: Keep the plants where they could get at least 1 hour of partial sunlight. If not possible keep it outdoors in partial sunlight once a week.

4. Pots: Use plastic pots to avoid messing the room. And should look over the water level in it.

Medicines

Normally indoor plants are less affected by insects. In case insects’ attacks it can be removed by any insecticide neem oil is mostly preferred.

But the most infected diseases are root rot or fungal attack. For that anti-fungal should be used and kept in sunlight (partial or direct as per requirements).

For further information on indoor plants comment here.